
Steps to Install Aspera Connect
You only need to install IBM Aspera Connect the first time you access the EDRN LabCAS Aspera-on-Cloud from a computer. IBM Aspera Connect works with any browser.
- Go to the EDRN LabCAS Aspera-on-Cloud site.
- Sign in with your IBMId account for Aspera.
- When prompted, follow the on-screen instructions to install IBM Aspera Connect.
- If you are not prompted, download IBM Aspera Connect directly from IBM. Under "IBM Aspera client-deployed software", click the down-pointing chevron "⌄" by "IBM Aspera Connect" and find your platform on the list.
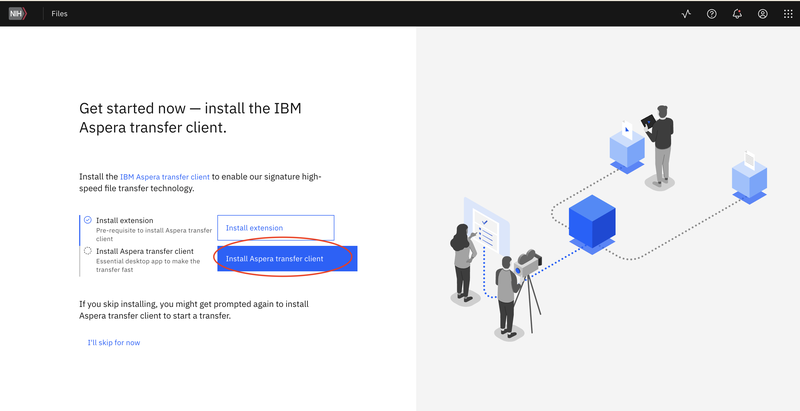
- Install the IBM Aspera Connect Transfer Client.
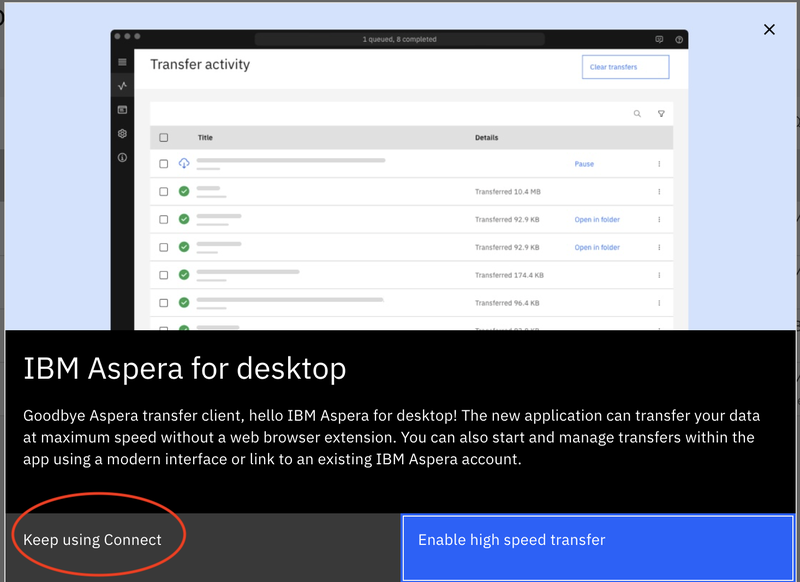
👉 Note: Do not install the Desktop version. If prompted to install the Desktop version, click Skip.
- Install the IBM Aspera Connect Transfer Client.
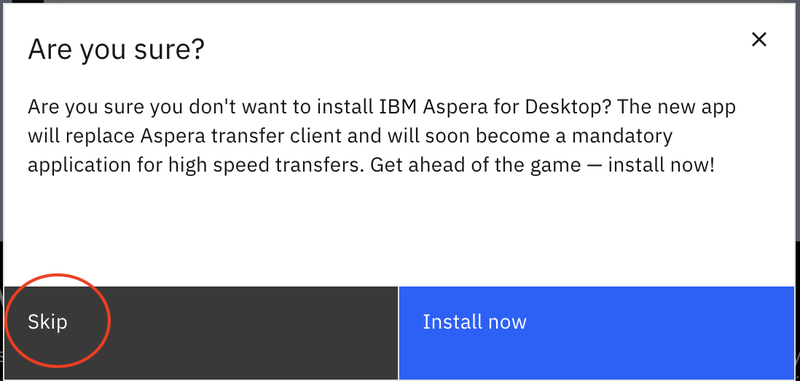
- Click "Skip". Do not install the Desktop version.
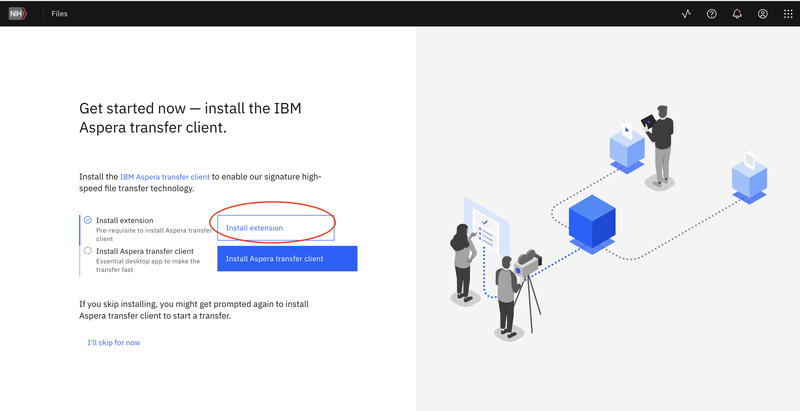
- Install the IBM Aspera Connect browser extension for your browser.
- In your browser's Extensions settings, click Add extension (or equivalent) to add the extension to your browser.
- Download the installation package.
- Walk through the installation agreement and click Accept.
- Return to the EDRN LabCAS Aspera-on-Cloud site and refresh the page.
- If prompted, click Allow to allow downloads from edrn-labcas.ibmaspera.com.