Google Colab and the Exercises
This page details the use of Google Colab—the collaborative laboratory tool and compute provider—used for the hackathon. By following the instructions on this page, you'll be able to run your own Jupyter Notebook on Colab that runs a sample convolutional neural network (CNN) on EDRN data.
Overview
We'll first use Aspera (a file transfer service) to get a subset of the data to analyze, then upload this data to our personal Google Drive, followed by leveraging Google Colab to run a CNN on the data using TPUs.
The main steps are:
- Download the data using Aspera.
- Upload it to Google Drive.
- Make a copy of the demonstration Jupyter Notebook.
- Run the notebook on Google Colab.
Getting the Data
Getting the data is simple. Follow these linked instructions on Aspera to log in and—if it's your first time—install the Aspera browser extension and helper app. Continue to follow the instructions on that page down to the section "Select the files to Download"; at this point:
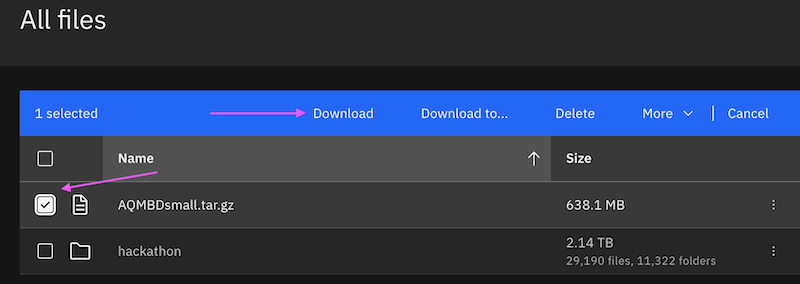
- Check the box by AQMBDsmall.tar.gz
- Click "Download" in the blue bar.

The file will be downloaded to your Downloads folder (by default).
👉 Note: Some operating systems or configurations will automatically decompress and/or extract the contents of AQMBDsmall.tar.gz; please either re-archive and recompress the file before proceeding to the next section.
Uploading to Your Google Drive
In order for Google Colab to use this data, it must be in a place where Google can access it. Google Colab, naturally, has access to Google Drive; so the next step is to upload the AQMBDsmall.tar.gz file to Google Drive.
To do so:
- Open your Google Drive by following this link in a new window or tab
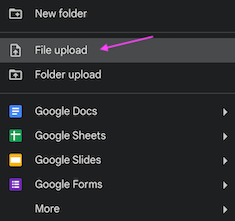
- Click the large "➕ New" button and choose "File Upload"

Upload the AQMBDsmall.tar.gz file. This may take a while.
Copy the Demonstration Notebook
Ashish Mahabal has provided a demonstration Jupyter Notebook to show a basic convolutional neural network (CNN) that we can run on the data in the AQMBDsmall.tar.gz file. Copying this notebook to your own drive will permit you to make modifications to explore options running the CNN, altering parameters, and so forth.
To copy the notebook:
- Visit the notebook available at this link in your browser in a new browser tab or window.
- Near the top, click "Copy to Drive".
- Optionally, feel free to click on "Copy of BasicCNN.ipynb" to give your personal copy of the notebook a distinctive name.

Run the Notebook
You're almost ready to run the notebook and make a basic CNN on the data in the newly uploaded file. You may want to scan through the code to see what's ahead, or dive right in.
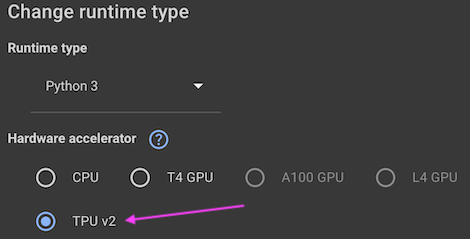
However, before you run it, you'll want to make sure the right hardware acceleration is allocated. Open the Runtime menu and choose "Change runtime type". "Python 3" should already be selected, however, make sure that "TPU v2" is the selected hardware accelerator.

Click Save.
Finally, to run the notebook:
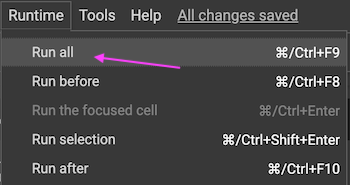
- Open the Runtime menu.
- Choose "Run all".

🚨️ Note: the first run will fail, because Google Colab will need permissions to access your Google Drive. Click "Connect to Google Drive", log in, and grant all permissions to Google Colab.

Then, choose "Run all" from the "Runtime" menu again to restart the notebook. You can scroll down to follow along and see how the notebook's running. After several minutes, it should come to a successful termination, including plotting of charts and display of data.
Congratulations!
